Bundles
A bundle (aka "Live Update") is an artifact of a build that is deployed to a live update channel within Capawesome Cloud. Bundles contain the web assets (HTML, CSS, JavaScript, images, etc.) of your Capacitor app that can be updated without going through the app store review process since no native code changes are involved.


Delivering a live update to your users typically involves the following steps:
- Build: You create a web build of your Capacitor app (either locally or using the Capawesome Cloud build service) which generates the web assets (HTML, CSS, JavaScript, images, etc.). If building locally, you then upload these assets as a bundle to Capawesome Cloud.
- Deploy: You deploy the bundle to a specific live update channel (e.g., "production", "staging", etc.) within Capawesome Cloud.
- Fetch: Your Capacitor app running on users' devices fetches the latest bundle from the specified live update channel using the Capacitor Live Update plugin.
- Apply: The app applies the fetched bundle, updating the web assets without requiring a full app update through the app store.
Capawesome Cloud provides multiple ways to create bundles for your Capacitor app, either by building them in the cloud or by uploading or registering them from your local machine or hosting service. Read on to learn more about how to create bundles in Capawesome Cloud.
Create Bundles
Build a bundle
It's possible to create a bundle without any local tooling by using the Capawesome Cloud build service. This service allows you to create a build for your app directly in the cloud, which will generate a bundle that can be deployed to a live update channel.
To create a bundle using the Capawesome CLI, use the apps:builds:create command:
If not specified, the CLI will prompt you to select the app, platform, and git reference (branch, tag, or commit SHA) you want to build. The CLI will then create the build in the Capawesome Cloud, which will start the build process and generate a build artifact.
As soon as the build is complete, a build number (e.g., #42) will be logged to the console.
You can then use this build number to create a deployment to a specific channel using the apps:deployments:create command:
If not specified, the CLI will prompt you to select the app, build number, and channel you want to deploy the bundle to.
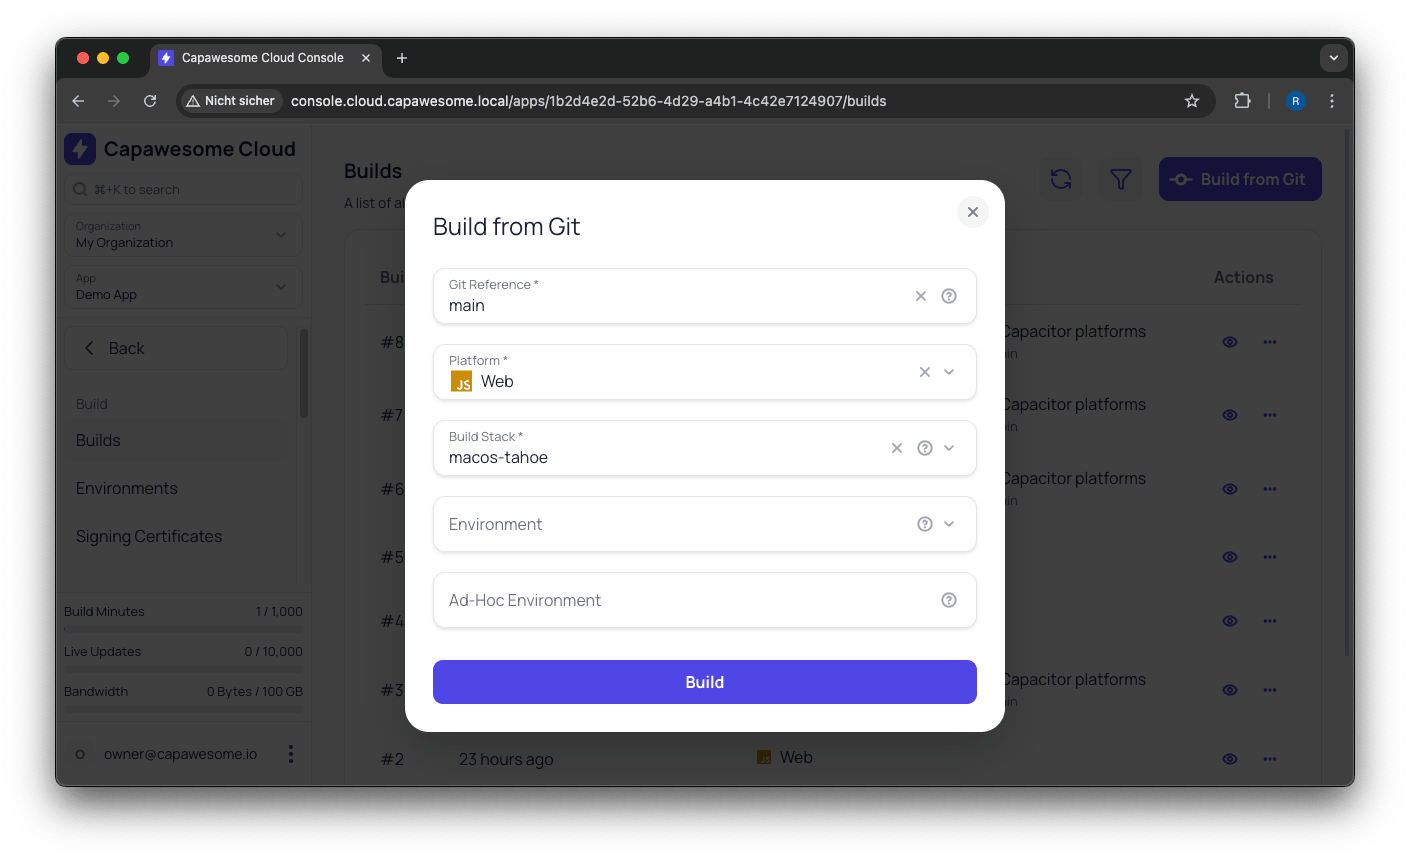
To create a bundle using the Capawesome Cloud Console, navigate to the app you want to create the build for, and click on the Builds menu item. Next, click on the "Build from Git" button, select the platform as "Web", and provide the git reference (branch, tag, or commit SHA) you want to build. Finally, click on the "Build" button to start the build process.
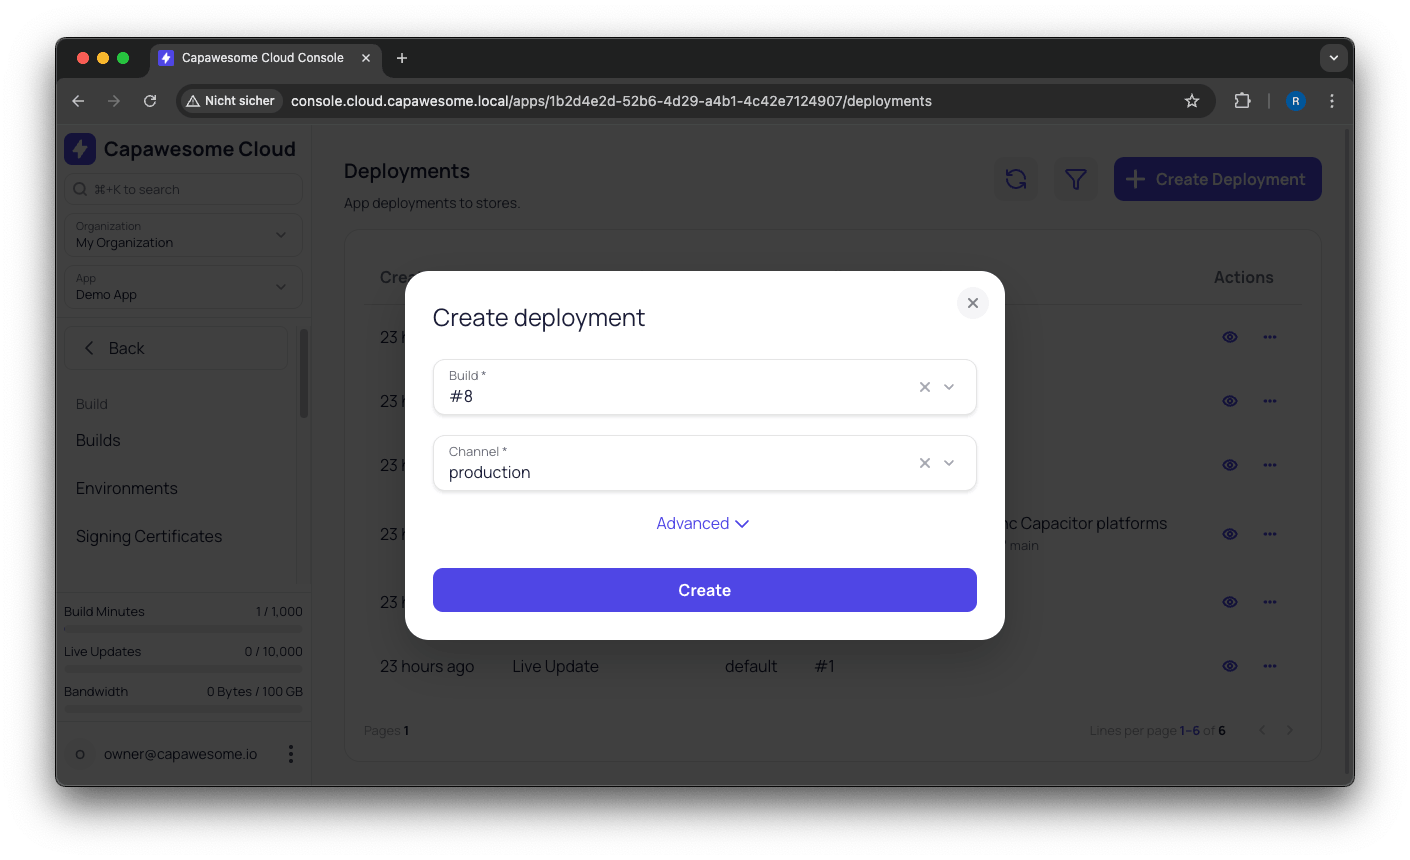
As soon as the build is complete, you can create a deployment to a specific channel by navigating to the Deployments menu item, clicking on the "Create Deployment" button, selecting the build you just created, and choosing the channel you want to deploy the bundle to.
Upload a bundle
You can also upload a bundle directly from your local machine using the Capawesome CLI. This is useful if you want to speed up the process or if you don't want to spend build minutes on Capawesome Cloud. However, keep in mind that this way you will not have access to the environment variables and secrets stored in Capawesome Cloud.
To upload a bundle using the Capawesome CLI, use the apps:liveupdates:upload command:
If not specified, the CLI will prompt you to select the app and channel you want to upload the bundle to, as well as the path to the web assets (HTML, CSS, JavaScript, images, etc.) of your Capacitor app (e.g., dist or www).
The CLI will then upload the bundle as build artifact and create a deployment in the specified channel making the bundle instantly available to your users.
Register a bundle
If you prefer to host your bundles on your own infrastructure or a third-party service (e.g., AWS S3, Firebase Hosting, etc.), you can register a bundle by providing the URL where the bundle is hosted. Read more about Self-Hosting.
To register a bundle using the Capawesome CLI, use the apps:liveupdates:register command:
If not specified, the CLI will prompt you to select the app and channel you want to register the bundle to, as well as the URL where the bundle is hosted. The URL must point to a ZIP file containing the web assets (HTML, CSS, JavaScript, images, etc.) of your Capacitor app. If you have not created the ZIP file yet, you can use the apps:liveupdates:bundle command to bundle the web assets into a ZIP file.
The CLI will then register the bundle as build artifact and create a deployment in the specified channel making the bundle instantly available to your users.
Advanced
Custom Properties
You can add custom properties to bundles to provide additional information:
npx @capawesome/cli apps:liveupdates:upload --custom-property key1=value1 --custom-property key2=value2
This can be useful for tracking metadata such as the version number, release notes, or any other information you want to associate with the bundle. Using the fetchLatestBundle(...) method of the Capacitor Live Update plugin, you can then access these properties in your app:
import { LiveUpdate } from "@capawesome/capacitor-live-update";

const fetchLatestBundle = async () => {
  const { customProperties } = await LiveUpdate.fetchLatestBundle();
  // customProperties = { key1: 'value1', key2: 'value2' }
};
Custom properties can be updated at any time using the Capawesome Cloud Console or the Capawesome CLI.
Expiration
You can set a custom expiration date for build artifacts using the --expires-in-days flag:
This can be useful if you want to ensure that build artifacts are only available for a limited time, such as for beta testing or temporary releases. After the specified number of days, the build artifact will be automatically deleted from Capawesome Cloud. Please note that the custom expiration date cannot be higher than your plan's maximum retention period.
Rollout
If you want to gradually release a bundle to your users, you can use the rollout feature to control the percentage of users that receive the update. This allows you to monitor the update for any issues before rolling it out to all users.
This command will upload the bundle with a rollout percentage of 10%, meaning that only 10% of users will receive the update initially. Read more about Rollouts.
Versioning
One way to restrict live updates to specific native versions is by using Versioned Bundles. When uploading a bundle, you can specify the minimum, maximum, and equivalent version codes for both Android and iOS platforms.
npx @capawesome/cli apps:liveupdates:upload --android-eq 3 --android-max 5 --android-min 1 --ios-eq 1.0.3 --ios-max 1.0.5 --ios-min 1.0.0
On Android, the versionCode from the android/app/build.gradle file is used (e.g., versionCode 3), while on iOS, the CFBundleVersion from the Info.plist file is used (e.g., <key>CFBundleVersion</key><string>1.0.3</string> or <key>CFBundleVersion</key><string>3</string>). We recommend to NOT use semantic versioning for the iOS CFBundleVersion to keep both platforms consistent.
This allows you to control which native versions of your app can download and apply the live update bundle, ensuring compatibility and preventing potential issues with unsupported versions. Read more about Versioned Bundles and Versioned Channels.